Showing posts with label step by step. Show all posts

Saturday, 2 June 2018

Blood Red Skies - Painting The BF109E Squadron

Blood Red Skies - Painting The BF 109 Squadron


With the arrival of the Blood Red Skies starter set and getting the Adlertag set from Warlord games, I now have thirteen BF109's, two squadrons of six planes and the Ace Aldolf Galland.


A few of the research pictures of possible paint schemes. 

With the scheme I went off to the LFGS and picked up the colours need, I've chosen to use GW paints on this occasion, as I usually stick with Vallejo for WW2 miniatures. 

The Paints I purchased. 

Caliban green - (To be mixed with a little black) for the top and wing "triangles"
Dawnstone -  for the other "triangles and base grey. 
Fenrisian Grey - for the underside
Flash Gitz Yellow - for the nose and tail marking.


I started by giving them a spray coating of black. 

Underside

The underside was given a base coat of Fenrisian Grey and then washed with Agrax Earthshade, then brought back up to Fenrisian Grey leaving the panel lines. I didn't bother highlighting further as you're not going to see the underside that much. To finish the underside I picked out the wheels in black. 

Wings and Fuselage

After looking at the reference pictures I decided to go with the triangular pattern instead of the mottled design for the wings. The black and Caliban Green mix was added to the upper sides of the wings and the top and sides of the fuselage. Then following the triangular design pattern above from the reference pictures. I've used Dawnstone to paint on the markings, just on the wings.  

The fuselage I went for the mottled pattern, as in the reference images. then drybrushed up with Dawnstone over the Black/Green mix across the whole miniature. I added a little bit of white to drybrush over the Dawnstome wing section to bring out the paneling and details. 

The Nose and Rudder

   I base coated them with Zamesi Desert and then gave them a light wash with Agrax Earthshade. Once dry, lightened them up to Flash Gitz Yellow leaving recesses dark. The spinner was painted back to black and given a small highlight of Dawnstone. 


Windows and Canopy

These were base coated Lothern Blue and given a wash of Drakenhof Nightshade, then once dried, highlighted back up to Lothern Blue and a small final highlight with some white added to the blue. The frames of the canopy where picked out in Dawnstone. To finish off I added a coat of  gloss varnish over the glass areas


The first six Painted BF109E's before the decals


I really think that the BF109's come to life once the decals are applied. They were god quality and very easy to apply. Once applied I gave the transfers a coat of Matte varnish to help seal them in. 


Decals are from 1/144 Direct

Next up was the
Fighter Ace - Adolf Galland

My reference picture


Then it was decided  an attempt on the yellow wing tipped fighters, I'm only wanting to make a pair. 


The Black Buzzard

In the usual fashion as the Soviet Yak-1 article I've chosen a cover of a Commando comic to paint up an Ace or Squadron leader.

The Commando Comic cover by Benet

Oberst Von Regner. 


The Black Buzzard and his wingmen


Starscream

In Jet Mode


In BF109 mode. 


Friday, 13 November 2015

Robotech RPG tactics

Robotech RPG Tactics -
 "Aircraft approaching on course 107"


"Robotech® RPG Tactics™ is a fast-paced, tabletop combat game that captures the action and adventure of the Robotech® anime. Two or more players can engage in small squad skirmishes or scale up to massive battles. Relive the clashes of the First Robotech War, engage in stand-alone tactical games, or use the dynamic game pieces to enhance your Robotech® RPG experience.
Mecha vs Mecha. Take command of the fighting forces of the United Earth Defense Force (UEDF) valiantly defending Earth from alien annihilation. Or lead the massive clone armies of the Zentraedi Armada to recover an alien artifact of immense power and enslave humankind." - Palladium books Inc


This was a very much an impulse purchase, I really liked the series (Which i watched as an adult) and even had a Regult battle pod toy as a child.This game was filling a gap of an anime based miniature game. I really don't fancy Infinity, I play too many skirmish Sci-Fi games e.g. Urban war and Deadzone. The Scale is good (6mm) so huge mechas aren't huge miniatures. 

So the order was made with next day delivery and here it is.


The box itself its very large and very deep, the box was filled with loose sprues, none of the sprues were damaged so I was happy about that. Checking through all of the components I was short of one base. I contacted Palladium books but still awaiting response.

The Forces

Zentraedi 

The Zentraedi  were a genetically engineered warrior raced of clones that served the Robotech masters. 

Regult Sprue 
(you get four of these in the box and each sprue contains three Regults)


The Recovery pod sprue on the Left and the Recon pod and Glaug on the right.

On the whole the Zentraedi Miniatures were easy to put together with little hassle.


UEDF (United Earth Defence Force) 

The United Earth Defense Force was the unified combatant command primarily responsible for the defence of the planet Earth from the Zentaedi invasion of 2009, during the first Robotech war


Each Valkyrie has three modes.
Guardian sprue

The Guardian mode is clearly the hardest to hit mode, due to its Hover ability. Also packs a punch with its ability to also launch at wing mounted weapons too.
The Miniature was OK to put together until it came to the arms, they are not labelled on the sprue, so a lot of trial and error occurred to get ones that fit.


Battloid sprue

The Battloid mode is the giant robot mecha mode, it is more agile in close combat and its better at firing its rifle, but it's unable to fire any wing mounted weapons. To build, it was less frustrating than the Guardian mode , but still suffered from the sprue not being numbered making it hard to get arms that work as a pair.


Jet Sprue

The fastest of all modes, Even if it a little bit restrictive, but makes sense as it is a jet. So great to get into position and then change mode to fit the requirement needed. Jet mode does have the ability to launch a scary amount of fire-power from its wing mounted weapons.


You get enough sprues to make five Valkyrie in each of there three different modes. (Jet, Guardian or battloid)
A total of fifteen miniatures

Tomahawk Destroid and Defender Destroid Sprues

I haven't built up any Destroids as yet, but the spures are mirrored so they seem to not too difficult to build up.

Cards 

Special Character cards 

I like these as you can upgrade certain mecha with characters from the show. although some characters are unable to be used straight out of the box, its still great to have had them included.

The cards do look a little faded in the pictures but that is because i put them in clear card sleeves, so i can assure you they are really vibrant in colour.


Unit cards
I'm impressed with these cards as everything is on these cards, including the three modes for the Valkyries, they are double sided with the weapon stats, any special abilities and  special rule keywords. The cards are the usual playing card size.


The Blast Template and Waterslide transfers for both factions


Core Force Cards -(Khyron card added for scale)
Each Army needs a minimum of two core force cards and another one for each additional 150 pts  in a game  (so an army of 450pts needs three core force cards). This saddens me as I cannot create an army with the Zentraedi in the box


Support cards
These are added to the Force cards to add just a little bit extra bit of variation and choice, Each card is smaller than the usual playing card size, 


Soft Cover Rulebook
The Rulebook is very nicely put together, so shiny! The Cover art is very nice and it continues the high quality images all through out the book.  Broken into rules, forces & background along with a great painting guide at the back of all of the available unit choices in the rulebook.

The forces and background section includes all of the available units for each force (seems to be to the end of the macross saga)

The Rules don't seem too heavy, more fast paced like the anime. I will go into rules more on "My first game".

A small section cover scenarios, campaigns and add on rules for the Roleplaying game game


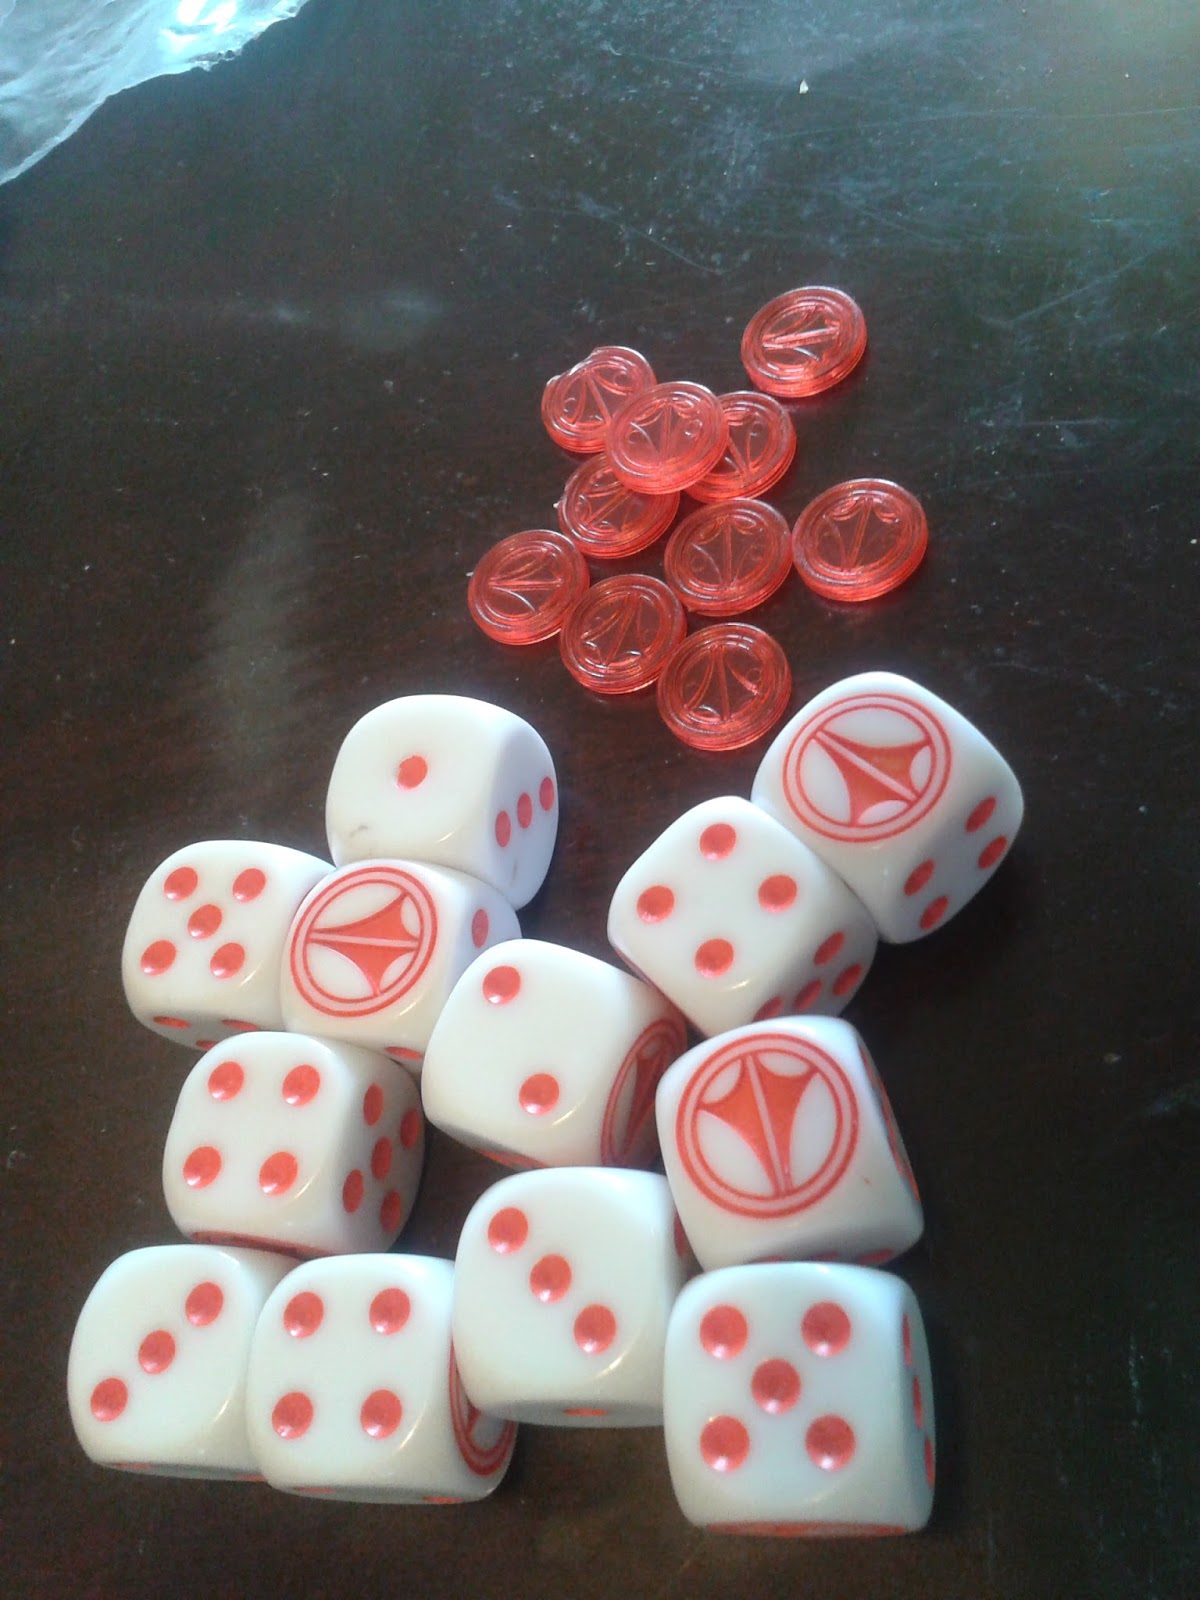
Here are the Faction dice and the ten Command tokens for each of the two factions in the box  (No Malcontents sorry!)

Painted up so far.


"Corp. Ben Dixon reporting & while I'm around I assure nothing will go wrong" - Corp. Ben Dixon


"Corp . Max Sterling, Sir. Call me Max.. I'm very inexperienced & might be needing a lot of help" - Corp Max Sterling


 Up next , More painted Miniatures and My First game.........

Tuesday, 10 January 2012

Bushido Painting the Prefecture of Ryu - Step by step


Bushido Painting the Prefecture of Ryu - Step by step

This is my first attempt at a step by step paint guide. i have just started playing Bushido and i was eager to get the miniatures painted up as quick as possible. I'm one of those players who don't like to play with unpainted miniatures.


The miniature i will be painting is the Ashigaru Yari weilder,Jin
I chose this miniature to show to paint the main uniform which all of the force has. so the colours are transferable.
Now i have to mention that i paint using Citadel paints from Games workshop.


I based my force with temple bases, following this tutorial here


 To begin with i started with a spray basecoat of chaos black.


Basecoat

Basecoats:

Undersuit- Regal blue
 Armour - Chaos black
Yari (Spear) shaft - Snakebite leather
Yari Tip - Boltgun metal
Yari pads- Bleached bone
Yari tassle - Scab red
Skin - Tanned flesh
Sash (around waist)- Space wolf grey


Main colour


Main colours:

Undersuit- Enchanted blue
Armour - Codex grey
Yari (Spear) shaft - Snakebite leather, bleached bone 50/50 mix
Yari Tip - Chainmail
Yari pads- Skull white (Highlight edges)
Yari tassle - Blood red
Skin - Dwarf flesh
Sash (around waist)- Skull white


First highlight


First highlights:

Undersuit- Enchanted blue, Skull white 75/25 mix
Armour - Fortress grey
Yari (Spear) shaft - Snakebite leather, Bleached bone 25/75 mix
Yari Tip - Mithril silver
Yari pads- Finished
Yari tassle - Blood red, Blazing orange 75/25 mix
Skin - Dwarf flesh, Elf flesh 50/50 mix
Sash (around waist)- Finished

Second highlight


Second highlights:

Undersuit- Enchanted blue, Skull white 50/50 mix, adding more white each stage for lighter and sharper higlights
Armour - Finished
Yari (Spear) shaft - Finished
Yari Tip - Black ink
Yari pads- Finished
Yari tassle - Finished
Skin - Elf flesh
Sash (around waist)- Finished
Hair - Codex grey for hair highlights


Finished


With the base completed this is the final stage of the step by step. I hope this is useful for you.
Feel free to leave any comments